
ImgPen image editor logo

ImgPen image editor plugin
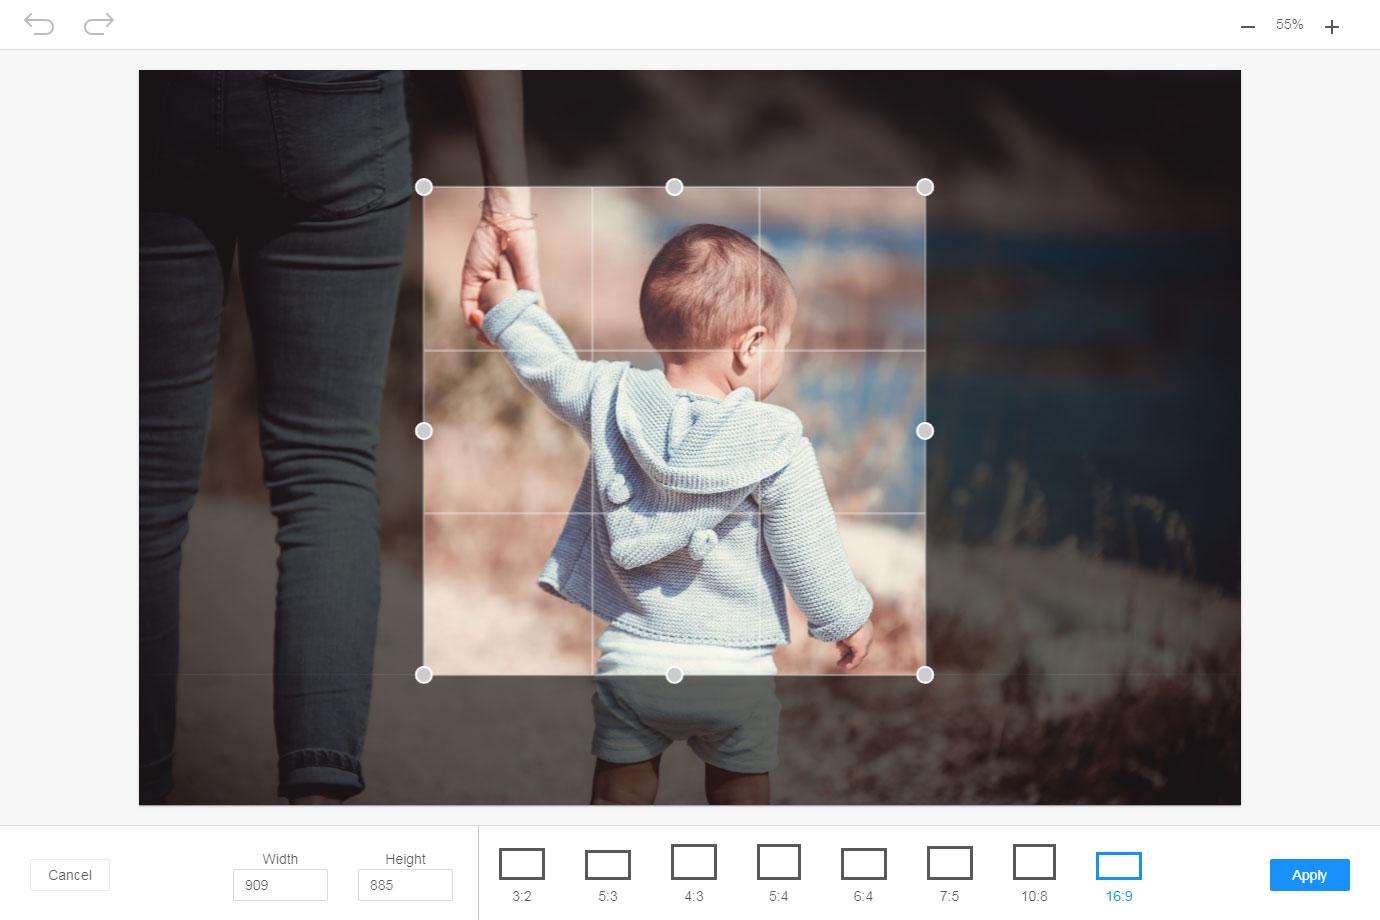
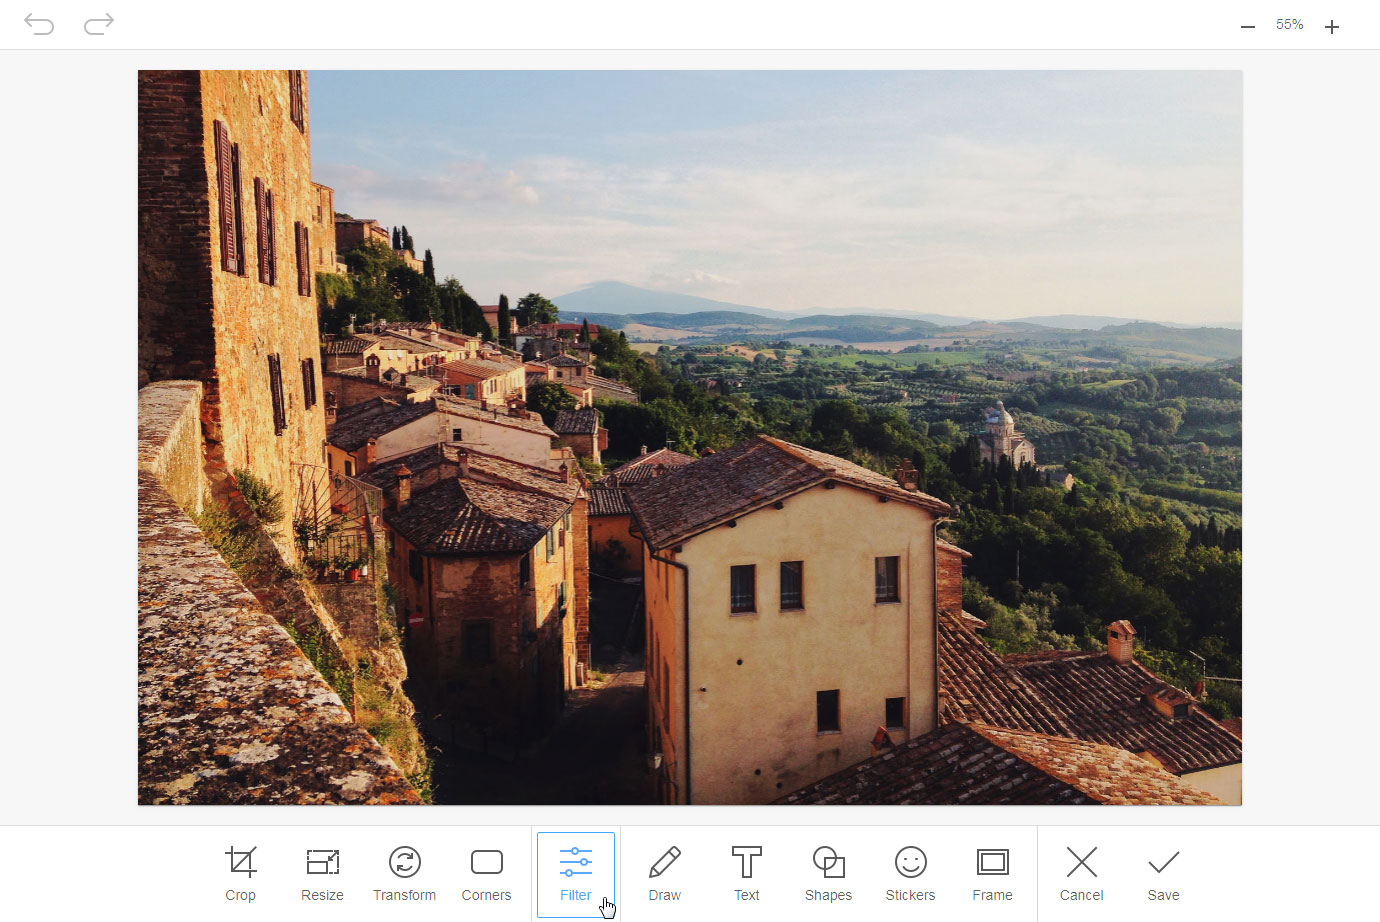
Crop, resize, transform, filter tools for editing images
Image Editor crop tool screenshot
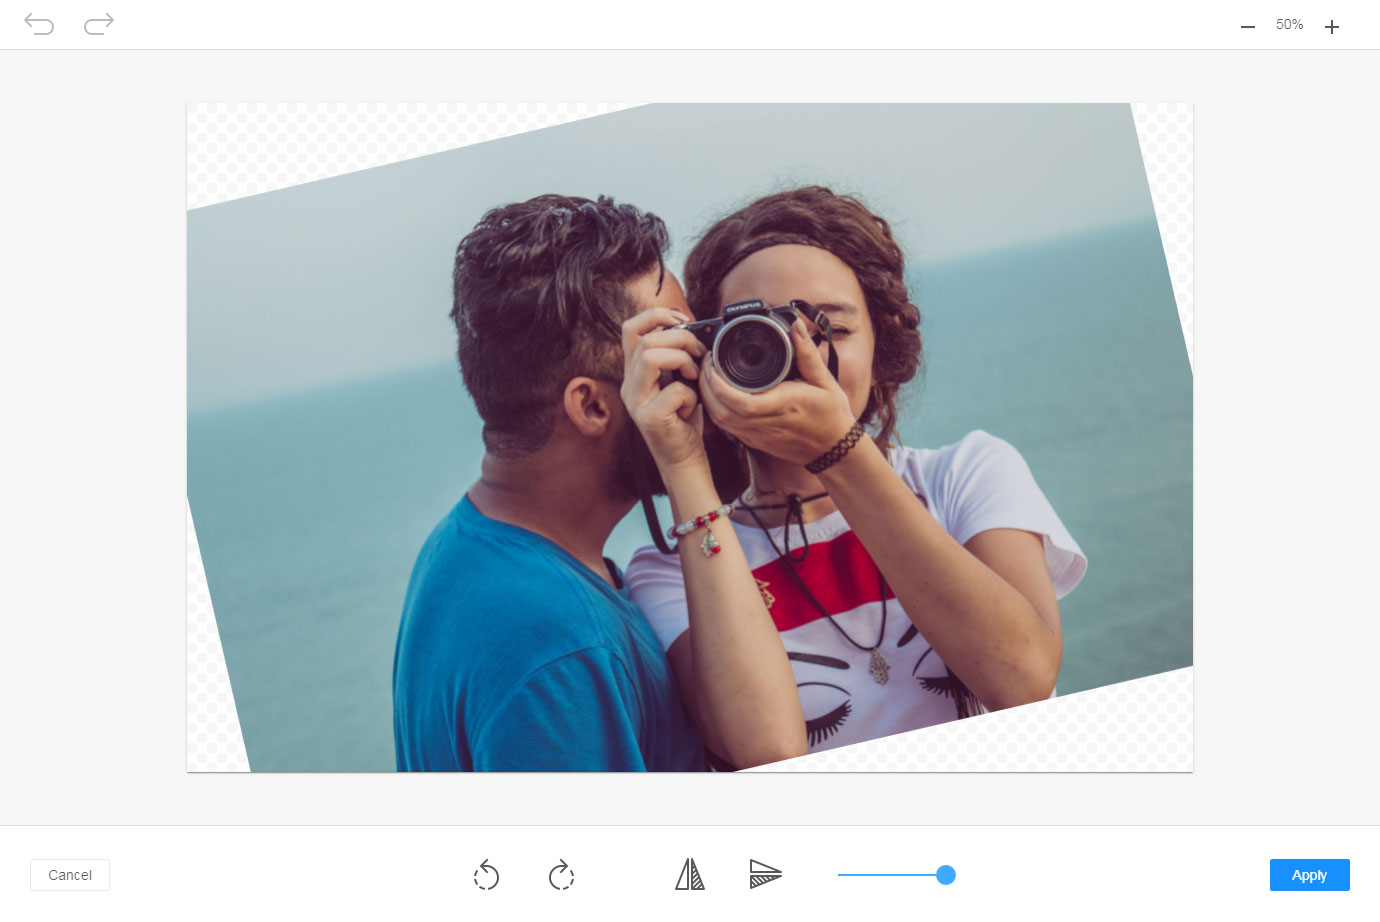
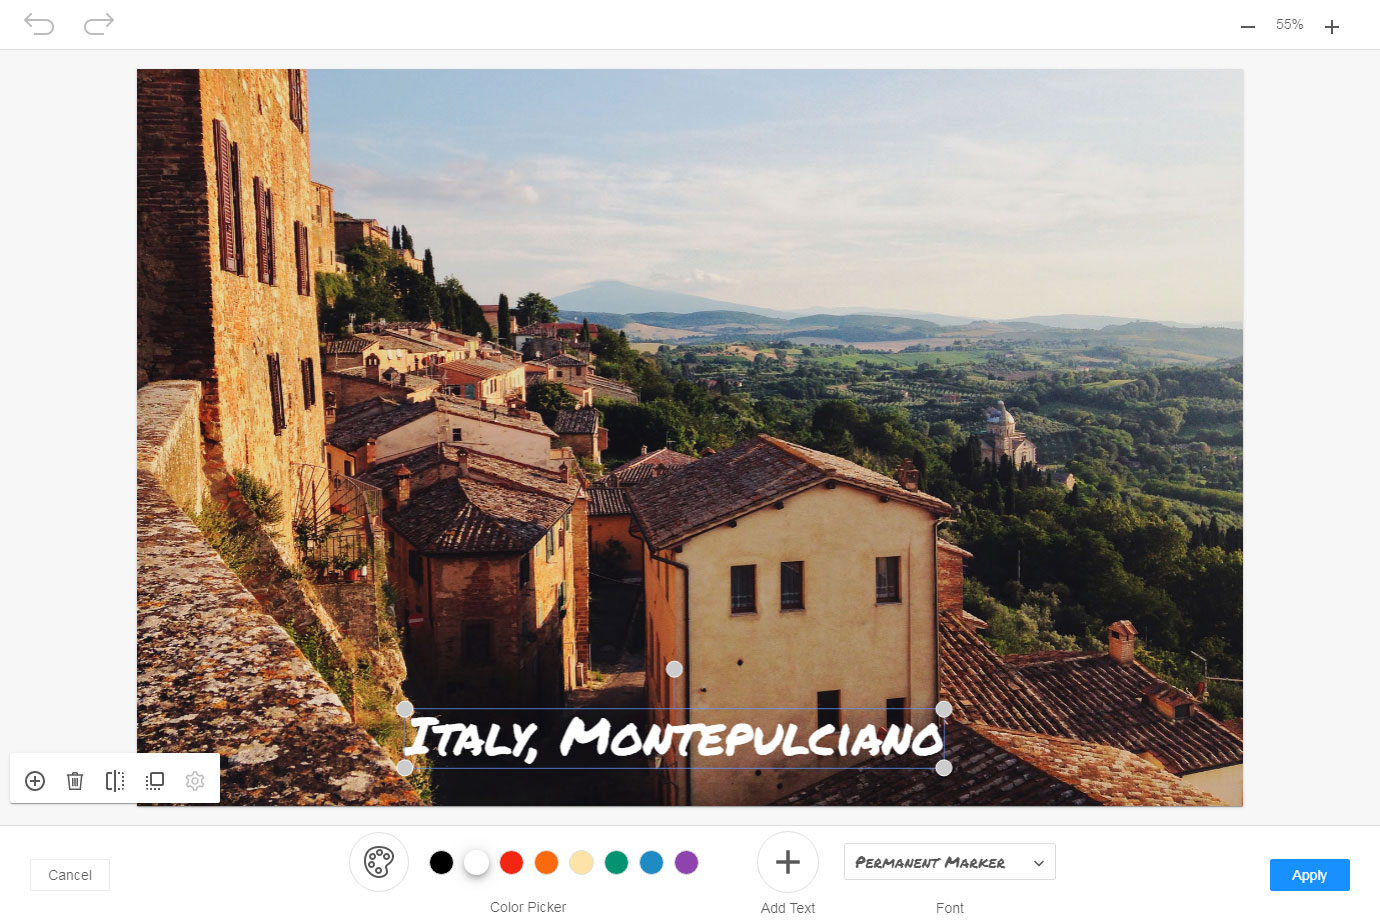
Image Editor crop tool screenshotImage Editor toolbar screenshotImage Editor rotate tool screenshotAdd text for picture screenshot
ImgPen image editor logo

Image editor ideally integrates to your WYSIWYG editor (with or without N1ED) and allows you to edit all types of raster images you typically use in your articles, product cards in your online store and so on.

With the image editor you can adjust the size of the image, lighten it up, raise contrast and many more. ImgPen features all standard tools: crop, rotate, add text, draw, apply filter, etc.

All edited images will be uploaded to the website and stored in the same place. Using image editor well fits the file manager that helps storing versions of the edited images.

ImgPen works with PHP, Java or Node websites. And if N1ED or Flmngr file manager are installed, no additional server-side configuring is required.

Get more info on ImgPen image editor home page: https://imgpen.com

Editor42 logo Editor42
TinyMCE logo TinyMCE
CKEditor 4 logo CKEditor 4
Froala logo Froala
TinyMCE 5 logo TinyMCE 5
TinyMCE 4 logo TinyMCE 4

Install ImgPen image editor plugin in Editor42
Download ImgPen image editor
ZIP archive of ImgPen image editor for Editor42
Self-hosted Editor42
Editor42 from CDN

Install the plugin to Editor42 hosted on your server

  1. Copy ImageEditor directory to editor42/plugins/.
  2. Edit Editor42 config and add ImageEditor to plugins parameter.

All the buttons this plugin will add to your toolbar automatically.

Example

Here you can see sample Editor42 initialization code with config inside it:

editor42.init({
    selector: "#editor",
    plugins: "ImageEditor",

    // apiKey: "...",
    // Get your own key in the Dashboard: https://n1ed.com/dashboard
});

Install the plugin to Editor42 loaded from CDN

  1. Copy ImageEditor directory somewhere on your server where it can be accessible by a link.
  2. Specify the location of just copied ImgPen image editor plugin adding key-value pair in external_plugins Editor42 config parameter.
  3. Edit Editor42 config and add ImageEditor to plugins parameter.

All the buttons this plugin will add to your toolbar automatically.

Example

Here you can see sample initialization code of Editor42 loaded from CDN with config inside it:

editor42.init({
    selector: "#editor",
    plugins: "ImageEditor",
    external_plugins: {
        "ImageEditor": "http://example.com/public/ImageEditor/plugin.min.js",
    },

    // apiKey: "...",
    // Get your own key in the Dashboard: https://n1ed.com/dashboard
});

ImgPen image editor comes as a part of N1ED. Read the official installation manual on developer website to know more.

Install ImgPen image editor plugin in TinyMCE

Download ImgPen image editor
ZIP archive of ImgPen image editor for TinyMCE
Self-hosted TinyMCE
Cloud TinyMCE

Install the plugin to TinyMCE hosted on your server

  1. Copy ImageEditor directory to tinymce/plugins/.
  2. Edit TinyMCE config and add ImageEditor to plugins parameter.

All the buttons this plugin will add to your toolbar automatically.

Example

Here you can see sample TinyMCE initialization code with config inside it:

tinymce.init({
    selector: "#editor",
    plugins: "ImageEditor",

    // apiKey: "...",
    // Get your own key in the Dashboard: https://n1ed.com/dashboard
});

Install the plugin to cloud edition of TinyMCE

  1. Copy ImageEditor directory somewhere on your server where it can be accessible by a link.
  2. Specify the location of just copied ImgPen image editor plugin adding key-value pair in external_plugins TinyMCE config parameter.
  3. Edit TinyMCE config and add ImageEditor to plugins parameter.

All the buttons this plugin will add to your toolbar automatically.

Example

Here you can see sample cloud TinyMCE initialization code with config inside it:

tinymce.init({
    selector: "#editor",
    plugins: "ImageEditor",
    external_plugins: {
        "ImageEditor": "http://example.com/public/ImageEditor/plugin.min.js",
    },

    // apiKey: "...",
    // Get your own key in the Dashboard: https://n1ed.com/dashboard
});

ImgPen image editor comes as a part of N1ED. Read the official installation manual on developer website to know more.

Install ImgPen image editor plugin in CKEditor 4

Download ImgPen image editor
ZIP archive of ImgPen image editor for CKEditor 4

Then do these simple steps:

  1. From the archive, copy plugins/ImageEditor/ to ckeditor/plugins/ImageEditor/, and its skin skins/n1theme/ to ckeditor/skins/n1theme/.
  2. Edit CKEditor config: add ImageEditor to extraPlugins parameter and switch the skin to n1theme.

All the buttons this plugin will add to your toolbar automatically.

Using config file
Using initialization script

If you prefer to edit config.js of CKEditor, or your CKEditor is initialized in some non-editable part of your CMS, make these changes there:

CKEDITOR.editorConfig = function(config) {
    config.extraPlugins = "ImageEditor";
    config.skin = "n1theme";                   // N1ED's own theme for CKEditor
    config.allowedContent = true;              // keep the classes and attributes N1ED writes
    config.removePlugins = "iframe,magicline"; // N1ED has better support of this
    config.versionCheck = false;               // skip its upgrade notice of CKEditor itself

    // config.apiKey = "...";
    // Get your own key in the Dashboard: https://n1ed.com/dashboard
};

Some CMSs do not use config.js and let you edit only the CKEditor initialization script. Make these changes there:

CKEDITOR.replace("editorId", {
    extraPlugins: "ImageEditor",
    skin: "n1theme",                   // N1ED's own theme for CKEditor
    allowedContent: true,              // keep the classes and attributes N1ED writes
    removePlugins: "iframe,magicline", // N1ED has better support of this
    versionCheck: false,               // skip its upgrade notice of CKEditor itself

    // apiKey: "...",
    // Get your own key in the Dashboard: https://n1ed.com/dashboard
});

ImgPen image editor comes as a part of N1ED. Read the official installation manual on developer website to know more.

Install ImgPen image editor plugin in Froala

Download ImgPen image editor
ImgPen image editor plugin for Froala

Then go through these steps:

  1. Copy froala-image-editor.js from the archive somewhere to your server and add it as a <script> tag to the page, after the main script of Froala.
  2. Or skip the download and load it from our CDN:
    https://cloud.n1ed.com/v/latest/froala/froala-image-editor.js

Example

After installing the plugin you will have similar code on your page with Froala:

<script src="/path/to/froala.js"></script>
<script src="https://cloud.n1ed.com/v/latest/froala/froala-image-editor.js"></script>

<script>
    FroalaEditor('#editor', {
        // your Froala options
    });
</script>

Read the official installation manual on developer website to know more.

Install ImgPen image editor plugin in TinyMCE 5

Download ImgPen image editor
ZIP archive of ImgPen image editor for TinyMCE 5
Self-hosted TinyMCE 5
Cloud TinyMCE 5

Install the plugin to TinyMCE 5 hosted on your server

  1. Copy ImageEditor directory to tinymce/plugins/.
  2. Edit TinyMCE config and add ImageEditor to plugins parameter.

All the buttons this plugin will add to your toolbar automatically.

Example

Here you can see sample TinyMCE initialization code with config inside it:

tinymce.init({
    selector: "#editor",
    plugins: "ImageEditor",

    // apiKey: "...",
    // Get your own key in the Dashboard: https://n1ed.com/dashboard
});

Install the plugin to cloud edition of TinyMCE 5

  1. Copy ImageEditor directory somewhere on your server where it can be accessible by a link.
  2. Specify the location of just copied ImgPen image editor plugin adding key-value pair in external_plugins TinyMCE config parameter.
  3. Edit TinyMCE config and add ImageEditor to plugins parameter.

All the buttons this plugin will add to your toolbar automatically.

Example

Here you can see sample cloud TinyMCE initialization code with config inside it:

tinymce.init({
    selector: "#editor",
    plugins: "ImageEditor",
    external_plugins: {
        "ImageEditor": "http://example.com/public/ImageEditor/plugin.min.js",
    },

    // apiKey: "...",
    // Get your own key in the Dashboard: https://n1ed.com/dashboard
});

ImgPen image editor comes as a part of N1ED. Read the official installation manual on developer website to know more.

Install ImgPen image editor plugin in TinyMCE 4

Download ImgPen image editor
ZIP archive of ImgPen image editor for TinyMCE 4

Then do these simple steps:

  1. Copy ImageEditor directory to tinymce/plugins/.
  2. Edit TinyMCE config and add ImageEditor to plugins parameter.

All the buttons this plugin will add to your toolbar automatically.

Example

Here you can see sample TinyMCE initialization code with config inside it:

tinymce.init({
    selector: "#editor",
    plugins: "ImageEditor",

    // apiKey: "...",
    // Get your own key in the Dashboard: https://n1ed.com/dashboard
});

ImgPen image editor comes as a part of N1ED. Read the official installation manual on developer website to know more.

Reviews

We were looking for a new image editor after Aviary has gone. And have found this great add-on. We use it for regular CKEditor for many years.

User icon
Baard E.
Agency

We were migrating our editor to Froala and were looking for 3-rd party addons for work with media. We needed in file manager and image editor. This is awesome that we found Flmngr and ImgPen. They work great in conjunction. Integration wasn't a problem in Froala. I really love these tools.

User icon
Philip L.
Agency

I had implemented ImgPen photo editor in my project nearly 3-4 months ago and it's working perfectly: many tools, the editor is customizable and no editing restrictions.

User icon
Adam D.
Individual