Flmngr file manager logo

Flmngr file manager plugin

File manager and uploader tools
Flmngr screenshot
Flmngr screenshotManage image galleriesImages from Unsplash stockUpload files screenshotList of files screenshot
Flmngr file manager logo

Flmngr - a free file manager that perfectly integrates to your WYSIWYG editor alone or coupled with N1ED. Including and configuring it are simple, and usage experience is all accustomed and familiar.

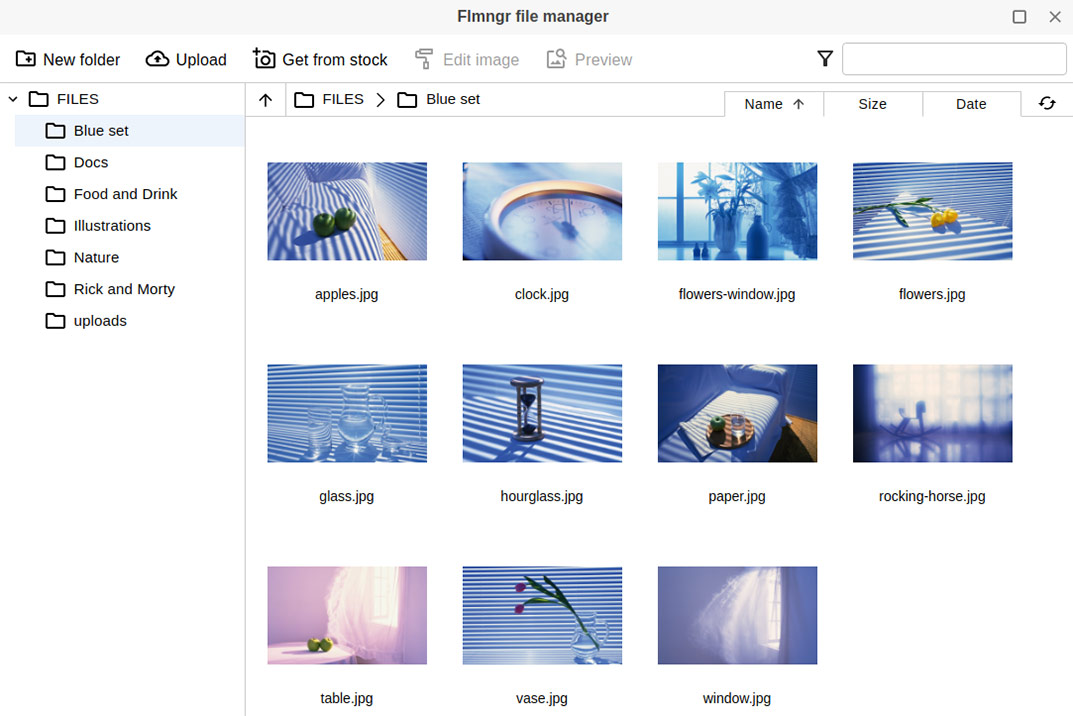
All standard features are here: dynamic browsing of large directories, managing folder structure, moving and uploading files, sorting, etc.

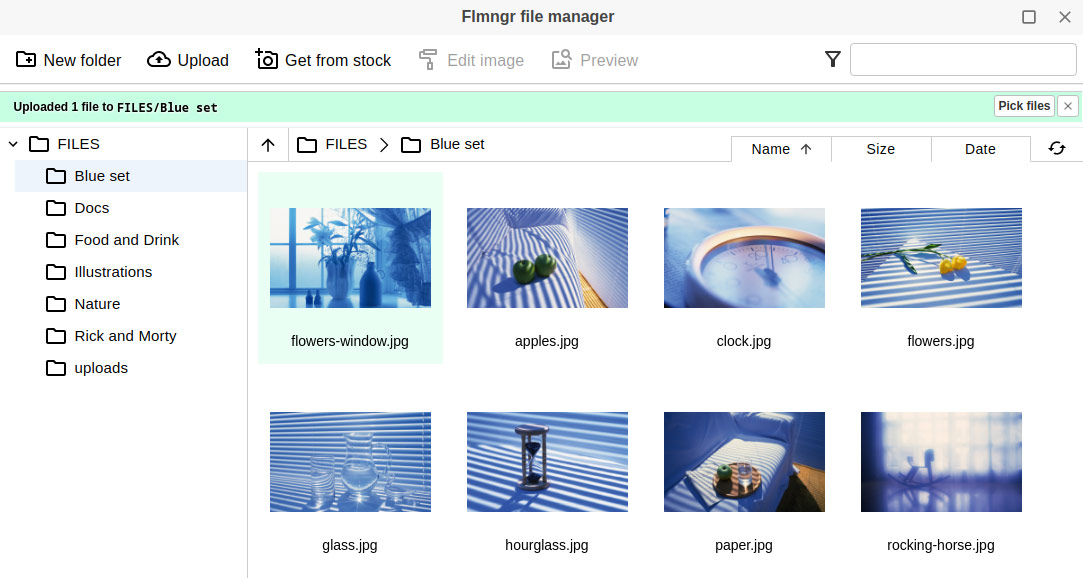
You can upload files from your computer, also in the bulk mode. Drag'n'drop is supported.

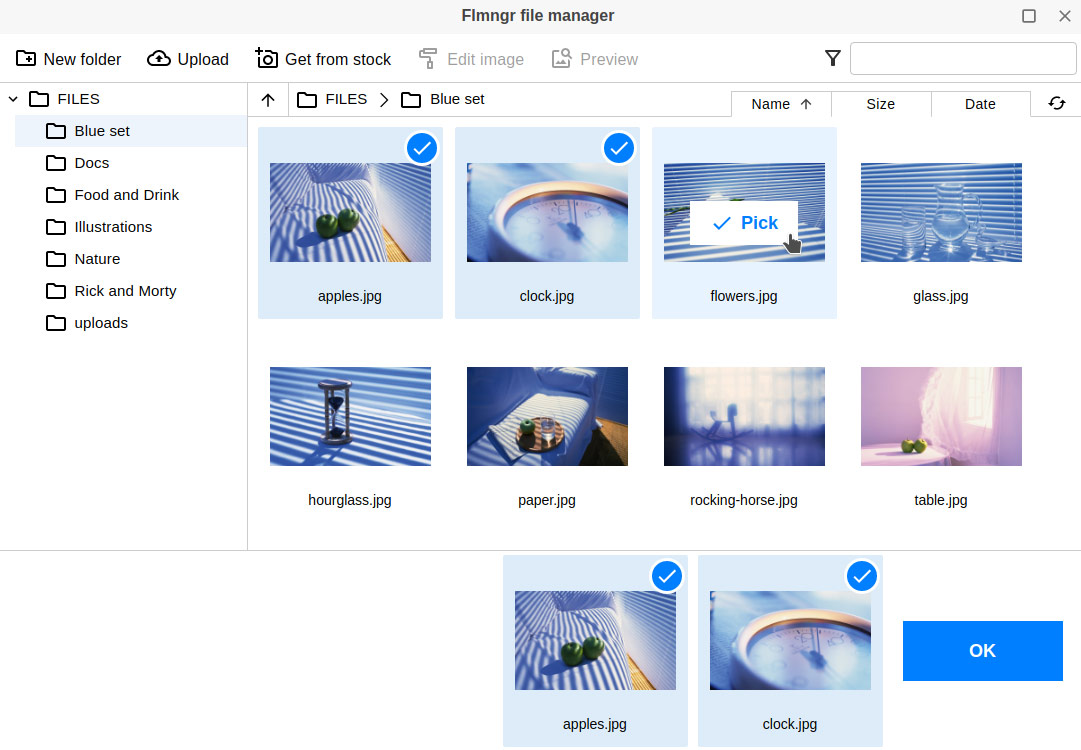
You can use for free everything you expect from a file manager. Premium users will unlock ImgPen image editor, picking stock photos from Unsplash, integrations for Amazon S3 and Azure Blob, multiselection (for managing galleries).

PHP backend can be installed as Composer package of by just copying files (legacy way). So you can integrate it into any CMS or framework, including Laravel, Yii, Symfony, Zend or any other.

Get more info on Flmngr file manager home page: https://flmngr.com

TinyMCE 6 logo TinyMCE 6
TinyMCE 5 logo TinyMCE 5
TinyMCE 4 logo TinyMCE 4
CKEditor 4 logo CKEditor 4
Froala logo Froala

Install Flmngr file manager plugin in TinyMCE 6

Download Flmngr file manager
ZIP archive of Flmngr file manager for TinyMCE 6
Self-hosted TinyMCE 6
Cloud TinyMCE 6

Install the plugin to TinyMCE 6 hosted on your server

  1. Copy file-manager directory to tinymce/plugins/.
  2. Edit TinyMCE config and add file-manager to plugins parameter.

Example

Here you can see sample TinyMCE initialization code with config inside it:

TinyMCE.init({
    selector: "#editor",
    plugins: "file-manager",
    buttons: "Upload Flmngr ImgPen", // or insert them into your toolbar config    
    Flmngr: {
        urlFileManager: 'http://example.com/path/to/flmngr.php',
        urlFiles: 'http://example.com/files/',
    },
});

Refer to TinyMCE add-ons installation manual for more details

Install the plugin to cloud edition of TinyMCE 6

  1. Copy file-manager directory somewhere on your server where it can be accessible by a link.
  2. Specify the location of just copied Flmngr file manager plugin adding key-value pair in external_plugins TinyMCE config parameter.
  3. Edit TinyMCE config and add file-manager to plugins parameter.

Example

Here you can see sample cloud TinyMCE initialization code with config inside it:

TinyMCE.init({
    selector: "#editor",
    plugins: "file-manager",
    buttons: "Upload Flmngr ImgPen", // or insert them into your toolbar config    
    Flmngr: {
        urlFileManager: 'http://example.com/path/to/flmngr.php',
        urlFiles: 'http://example.com/files/',
    },
    external_plugins: {
        "file-manager": "http://example.com/public/file-manager/plugin.min.js",
    },
});

Refer to TinyMCE add-ons installation manual for more details

Install Flmngr file manager plugin in TinyMCE 5

Download Flmngr file manager
ZIP archive of Flmngr file manager for TinyMCE 5
Self-hosted TinyMCE 5
Cloud TinyMCE 5

Install the plugin to TinyMCE 5 hosted on your server

  1. Copy file-manager directory to tinymce/plugins/.
  2. Edit TinyMCE config and add file-manager to plugins parameter.

Example

Here you can see sample TinyMCE initialization code with config inside it:

TinyMCE.init({
    selector: "#editor",
    plugins: "file-manager",
    buttons: "Upload Flmngr ImgPen", // or insert them into your toolbar config    
    Flmngr: {
        urlFileManager: 'http://example.com/path/to/flmngr.php',
        urlFiles: 'http://example.com/files/',
    },
});

Refer to TinyMCE add-ons installation manual for more details

Install the plugin to cloud edition of TinyMCE 5

  1. Copy file-manager directory somewhere on your server where it can be accessible by a link.
  2. Specify the location of just copied Flmngr file manager plugin adding key-value pair in external_plugins TinyMCE config parameter.
  3. Edit TinyMCE config and add file-manager to plugins parameter.

Example

Here you can see sample cloud TinyMCE initialization code with config inside it:

TinyMCE.init({
    selector: "#editor",
    plugins: "file-manager",
    buttons: "Upload Flmngr ImgPen", // or insert them into your toolbar config    
    Flmngr: {
        urlFileManager: 'http://example.com/path/to/flmngr.php',
        urlFiles: 'http://example.com/files/',
    },
    external_plugins: {
        "file-manager": "http://example.com/public/file-manager/plugin.min.js",
    },
});

Refer to TinyMCE add-ons installation manual for more details

Install Flmngr file manager plugin in TinyMCE 4

Download Flmngr file manager
ZIP archive of Flmngr file manager for TinyMCE 4

Then do these simple steps:

  1. Copy file-manager directory to tinymce/plugins/.
  2. Edit TinyMCE config and add file-manager to plugins parameter.

Example

Here you can see sample TinyMCE initialization code with config inside it:

TinyMCE.init({
    selector: "#editor",
    plugins: "file-manager",
    buttons: "Upload Flmngr ImgPen", // or insert them into your toolbar config    
    Flmngr: {
        urlFileManager: 'http://example.com/path/to/flmngr.php',
        urlFiles: 'http://example.com/files/',
    },
});

Refer to TinyMCE add-ons installation manual for more details

Install Flmngr file manager plugin in CKEditor 4

Download Flmngr file manager
ZIP archive of Flmngr file manager for CKEditor 4

Then do these simple steps:

  1. Copy file-manager directory to ckeditor/plugins/.
  2. Edit CKEditor config and add file-manager to extraPlugins parameter.
Using config file
Using initialization script

Example of configuring with config.js

If you prefer to edit config.js config file of CKEditor or when your CKEditor initialization code is placed inside some non-editable part of CMS, make these changes there:

CKEDITOR.editorConfig = function(config) {
    config.extraPlugins = "file-manager";
    config.toolbar = [ ["Upload", "Flmngr", "ImgPen"] ]; // or insert them into your toolbar config    
    config.Flmngr = {
        urlFileManager: 'http://example.com/path/to/flmngr.php',
        urlFiles: 'http://example.com/files/',
    };
};

Example of configuring inside initialization code

Some CMSs do not use config.js file and let to edit CKEditor initialization script only. Do this changes there:

CKEDITOR.replace("#editor", {
    extraPlugins: "file-manager",
    toolbar: [ ["Upload", "Flmngr", "ImgPen"] ], // or insert them into your toolbar config    
    Flmngr: {
        urlFileManager: 'http://example.com/path/to/flmngr.php',
        urlFiles: 'http://example.com/files/',
    },
});

Install Flmngr file manager plugin in Froala

Download Flmngr file manager
Flmngr file manager plugin for Froala

Then go through these steps:

  1. Copy file-manager JS file somewhere to your server and add it as a <script> tag to the page.
  2. Alternativaly you can use CDN version of this plugin and do not download it, URL is
    //cdn.jsdelivr.net/gh/edsdk/froala-file-manager@latest/js/froala-file-manager.js

Example

After installing the plugin you will have similar code on your page with Froala:

<script src="/path/to/froala.js"></script>
<script src="//cdn.jsdelivr.net/gh/edsdk/froala-file-manager@latest/js/froala-file-manager.js"></script>
    
<script>
    FroalaEditor('#editor', {        
        Flmngr: {
            urlFileManager: 'http://example.com/path/to/flmngr.php',
            urlFiles: 'http://example.com/files/',
        },
    });    
</script>
                    

Install server side

In order to upload and browse files and images, you need to install backend script which will process all your requests from the plugin.

PHP backend logoPHP backend installation
Install from Composer
Install by copying

Install PHP file manager from Composer

Download and install edsdk/flmngr-server-php package by running this console command:

composer require edsdk/flmngr-server-php

Then add in your controller and function serving some URL this code:

use EdSDK\FlmngrServer\FlmngrServer;

FlmngrServer::flmngrRequest(
    array(
        'dirFiles' => '/var/www/files'
    )
);

Install PHP file manager by copying the files

Sometimes you do not have Composer available on your server. No problem, here is a classic way to do it.

Download the latest version of PHP version of Flmngr:

Download PHP server module
ZIP archive of Flmngr backend

and then unpack it to some folder inside your website structure.

The location of where you unpack the files will affect to file manager URL parameter Flmngr.urlFileManager you will specify later. For example, if you unpack to /var/www/flmngr, the URL of File Manager will probably be /flmngr/flmngr.php.

Configure paths and URLs

URL of this script with Flmngr backend will be used as Flmngr.urlFileManager parameter on the client installation step to link backend with frontend.

dirFiles should lead to the directory where all your files are placed. It's recommended to use an absolute path to this directory. Public URL of this directory will be used on the client installation step as Flmngr.urlFiles parameter.

Install .NET file manager

Use NuGet to retrieve the package of Flmngr for .NET MVC applications: search for Flmngr package in Solution Explorer inside Visual Studio.

Configure paths and URLs

Inside Web.config file you should fill these sections:

<configSections>
    <section name="Flmngr" type="Flmngr.Configuration.FileManagerConfigurationSection, Flmngr, Version=1.0.0.0, Culture=neutral"/>
</configSections>

<Flmngr>
    <add key="crossDomainUrl" value="*"/>
    <add key="dirFiles" value="files"/>
</Flmngr>

<system.webServer>
    <handlers>
        <add name="FMHandler" verb="*" path="flmngr" type="Flmngr.Files.Handler, Flmngr" />
    </handlers>
</system.webServer>

According how you configure your path attribute in handlers section, depends which Flmngr.urlFileManager URL will you specify in the client installation step (installation on frontend) to link frontend with backend. In this example the value for frontend will be /flmngr if your application runs from the root URL of your server.

dirFiles should lead to the directory where all your files are placed. Public URL of this directory will be used on the client installation step as Flmngr.urlFiles parameter.

Use in Express
Run standalone

File manager for Node Express server installation

Install NPM package to add Flmngr code to your app:

npm install @edsdk/flmngr-server

Yarn users may use:

yarn add @edsdk/flmngr-server

Bind file manager on some URL

Attach Flmngr file manager to handle some URL on your Express server:

import express from 'express';
import bindFlmngr from '@edsdk/flmngr-server';

const app = express();

bindFlmngr({
    app: app,              // your Express application
    url: '/flmngr',        // URL to handle
    dir: '/var/www/files', // where files are stored into
    config: {}             // optional config
);

For the client installation step you will need to use your url value as Flmngr.urlFileManager on frontend to explain frontend where backend is located.

Please use absolute path for dir parameter. This directory must be available from outside by URL, its URL you can use as Flmngr.urlFiles in the client installation step (used to form URLs of files and images you insert). To make this derectory public, please serve it as folder with static content (if you did not do this yet):

app.use(express.static('/var/www/files'));

Run file manager microservice in Node

This way does not depend from any server/framework and can be used fully standalone or inside your custom app.

Install the package normally:

npm install @edsdk/flmngr-server

Yarn users may use:

yarn add @edsdk/flmngr-server

Then call this code to run Flmngr file manager server:

require("@edsdk/flmngr-server").startFlmngrMicroservice({
    host: 'localhost',
    port: 8080,
    url: '/flmngr',
    dirFiles: './www/files',
    dirRoot: './www'
});

Now you need to retrieve a value for Flmngr.urlFileManager needed for the the client installation step to link file manager dialog with server side. Just join protocol, port (if not 80), and URL. In this sample //localhost:8080/flmngr will be the value.

dirFiles parameter is used to explain to server side where all your files you want to browse are located. This directory must be opened from web and its URL will be the URL used as Flmngr.urlFiles in the the client installation step.

Install Java file manager backend

Java backend is prepared as Spring Boot application which can be run in any environment (Spring Boot is not required). You can handle some URL in it nad serve incoming requests from a file manager dialog and uploader.

Download Java module
ZIP archive of Flmngr backend

Then copy flmngr.jar to the place.

All the options are located inside application.properties file. Please configure port and directories there.

Your option Flmngr.urlFileManager required for linking file manager dialog with the backend will depend of preferences you typed in the file. I. e. by default this URL will be //localhost:22022/.

You will also need a value for Flmngr.urlFiles option for frontend. This will be the URL your dirFiles directory is available on web by. Please check that you configured your webserver to serve static content from it.

Run the server with the command:

java -jar flmngr.jar
or just (in Unix):
./flmngr.jar

Reviews

We are using file picker and we really like it. That is really nice! Thank you so much.

User icon
Joan G.
Agency

We are managing an online magazine and we have to keep a lot of pictures, we use. So Flmngr perfectly covered all our needs for uploading, managing, catalog and editing photos.

User icon
Sevan V.
Individual

We have installed filemanager into our saas platform. It's a very flexible tool with its own API. It perfectly works in multiuser environment. So we can protect files of one user from the actions of other users. This became the decisive argument when looking for the right file manager.

User icon
Ben D.
Web service (SaaS)

Nice file browser. Besides uploading and managing files, there is an image editing feature.

User icon
Noah S.
Individual

Tell a friend about Flmngr file manager

Send