How to install
TinyMCE 5 is released!
There is a newer version of TinyMCE. Please read about the new version of TinyMCE using the links below
TinyMCE 5 installation
Migration manual
Quick Installation
TinyMCE is an effective web development tool. It is insanely easy to install and use. All you have to do is download TinyMCE and copy the following code in the <head> of your web page.
<!DOCTYPE html>
<html>
<head>
<script src="//your installation path/4.1/tinymce.min.js"></script>
<!-- Just be careful that you give correct path to your tinymce.min.js file, above is the default example -->
<script>
tinymce.init({selector:'textarea'});
</script>
</head>
Of course, you can alternatively include the script of TinyMCE 4 into your <body> section. This affects the loading order only.
After inserting the code above into the webpage, you can insert the following to the <body>. This can vary, of course, depending on what you want to put to the <body>. Let’s use a simple <textarea> and some generic test as an example:
<body>
<textarea>Your content here</textarea>
</body>
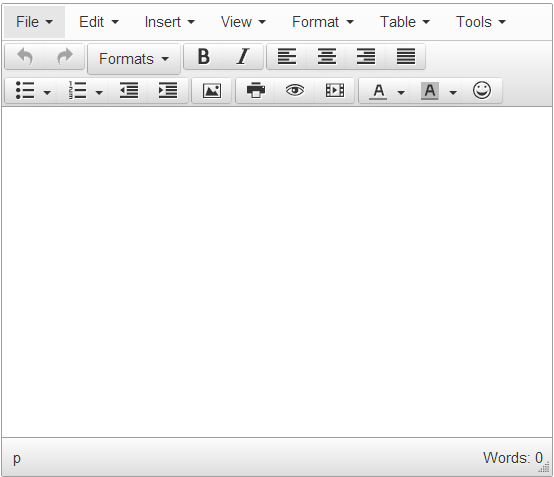
After you are done with the above mentioned steps, your quick configuration is complete. Here is the end result:

Basic installation is done now, now we need to configure our TinyMCE editor.
Advanced configuration
Advanced configuration offers a lot of options to you. You get the option to change width and height. You can install plugins of your choice, use advanced font options, create tables and more. In other words, your toolbar will be completely revolutionized.
Note: We will take a detailed look at all the options you get in advanced tutorials.
Another interesting addition in the advanced configuration is the custom CSS settings option.
So how do you get so much done? – Just by copy-pasting the following in as the initialization code for your TinyMCE:
<script type="text/javascript" src="tinymce_4.1.3/tinymce/js/tinymce/tinymce.min.js"></script>
<!-- Just be careful that you give correct path to your tinymce.min.js file, above is the default example -->
<script>
tinymce.init({
selector: "textarea#elm1",
theme: "modern",
width: 500,
height: 300,
plugins: [
     "advlist autolink link image lists charmap print preview hr anchor pagebreak spellchecker",
     "searchreplace wordcount visualblocks visualchars code fullscreen insertdatetime media nonbreaking",
     "save table contextmenu directionality emoticons template paste textcolor"
],
content_css: "css/content.css",
toolbar: "insertfile undo redo | styleselect | bold italic | alignleft aligncenter alignright alignjustify | bullist numlist outdent indent | link image | print preview media fullpage | forecolor backcolor emoticons",
style_formats: [
    {title: 'Bold text', inline: 'b'},
    {title: 'Red text', inline: 'span', styles: {color: '#ff0000'}},
    {title: 'Red header', block: 'h1', styles: {color: '#ff0000'}},
    {title: 'Example 1', inline: 'span', classes: 'example1'},
    {title: 'Example 2', inline: 'span', classes: 'example2'},
    {title: 'Table styles'},
    {title: 'Table row 1', selector: 'tr', classes: 'tablerow1'}
]
});
</script>
And this will go in your page’s <body> tag:
<body>
    <textarea id="elm1" name="area"></textarea>
</body>
Here is how TinyMCE looks like when advanced configuration is used:

Inline mode
How to configure inline editing option?
After learning quick, basic and advanced editing options, next we will learn how to install the inline editing option.
Inline editing option allows your content to be divided into different sections so you can edit the webpage accordingly. In the upcoming example we will create an inline option for our heading <h1> and our content <div>, and we see how they can be edited separately.
Place the following code in the <head>:
<script type="text/javascript" src="tinymce_4.1.3/tinymce/js/tinymce/tinymce.min.js"></script>
<!-- Just be careful that you give correct path to your tinymce.min.js file, above is the default example -->
<script>
    tinymce.init({
    selector: "div.edit",
    theme: "modern",
    plugins: [
        ["advlist autolink link image lists charmap print preview hr anchor pagebreak spellchecker"],
        ["searchreplace wordcount visualblocks visualchars code fullscreen insertdatetime media nonbreaking"],
        ["save table contextmenu directionality emoticons template paste"]
    ],
    add_unload_trigger: false,
    schema: "html5",
    inline: true,
    toolbar: "undo redo | styleselect | bold italic | alignleft aligncenter alignright alignjustify | bullist numlist outdent indent | link image     | print preview media",
    statusbar: false
    });
    tinymce.init({
        selector: "h1.edit",
        theme: "modern",
        add_unload_trigger: false,
        schema: "html5",
        inline: true,
        toolbar: "undo redo",
        statusbar: false
    });
</script>
Then create two tags for heading and content and place them into the page’s <body> like this:
<h1 class="edit">Edit this title</h1>
<div class="edit">This is my content</div>
And there you have it: two separately editable regions, and there is a way to install the inline editing option.
The above mentioned coding does not make the toolbar appear automatically, it would only appear once you click the content or the title.