Include CSS & JS logo

Include CSS & JS plugin

Include CSS and JS inside WYSIWYG editor to support website theme
Include CSS JS screenshot
Include CSS JS screenshotInclude Bootstrap screenshotInclude Foundation screenshot
Include CSS & JS logo

The Include CSS/JS add-on gives you full control over including of stylesheets and JavaScript files in your document and the page the document is edited on.

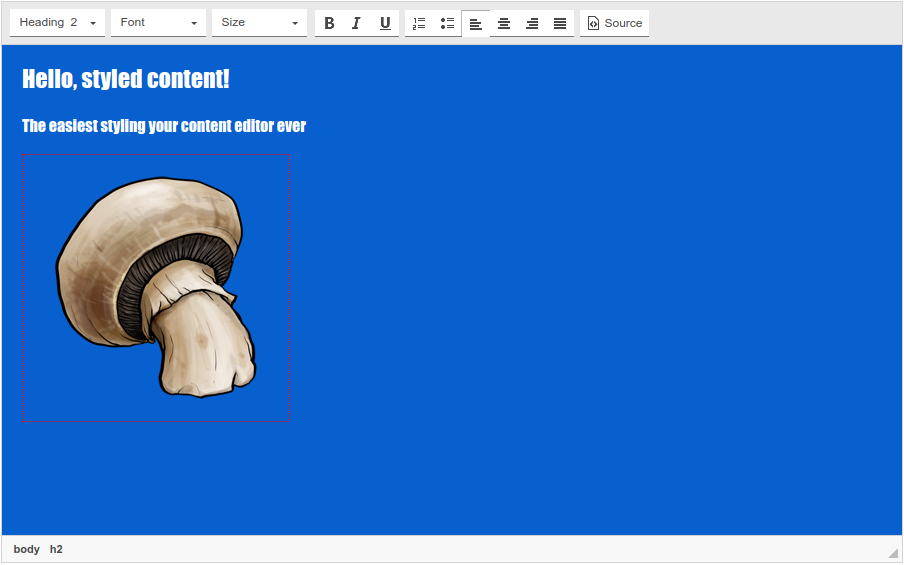
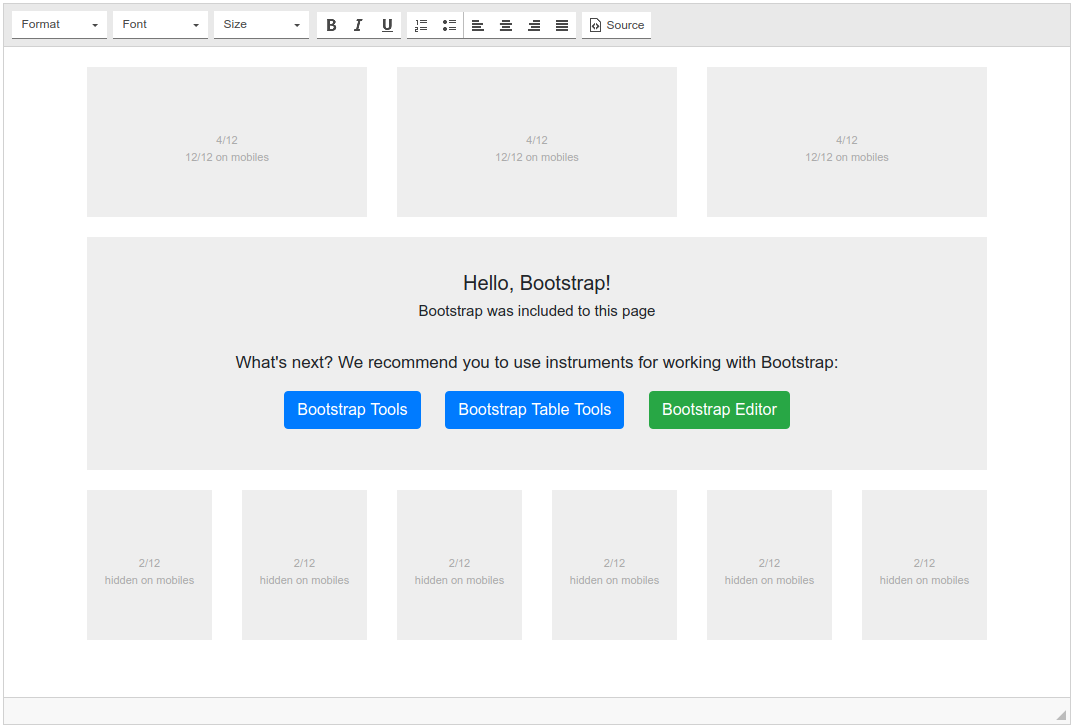
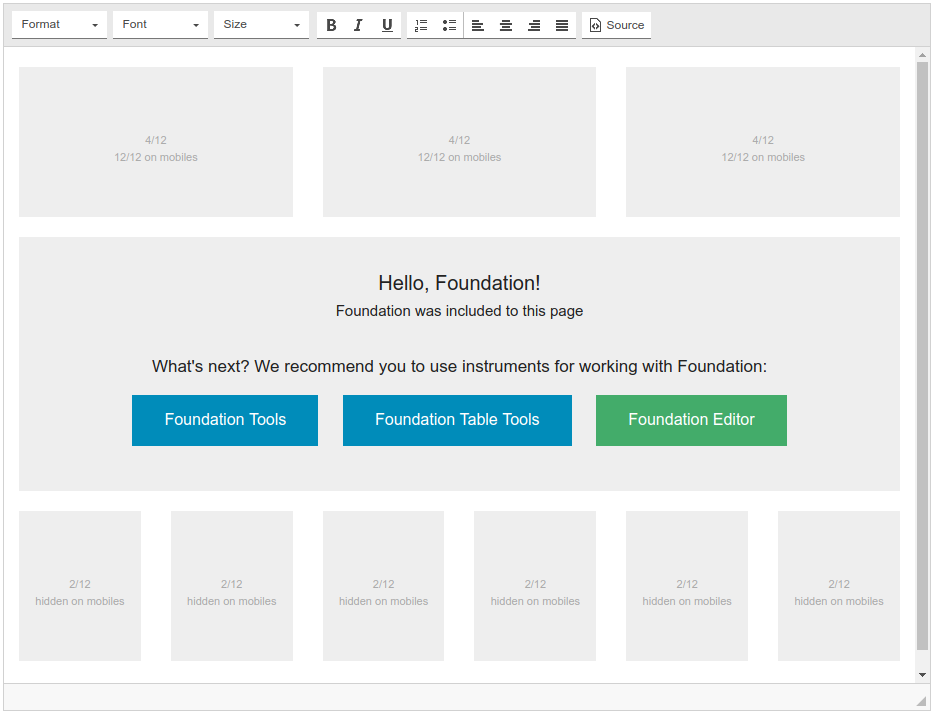
The plugin is especially handy if you use Bootstrap or Foundation framework on your website: in this case you can painlessly make content of the document in CKEditor or in TinyMCE responsive and correctly marked up. Thanks to fine-tuning you can specify which components of Bootstrap/Foundation you want to apply. The add-on supports downloading from the official CDN as well as from your local installations of the framework.

If you use your own CSS framework or custom styles, you can manually specify a set of file to include. That is, you can adapt the edited document to the style of your website. It is much easier to edit pages when you see them exactly in the same fonts, sizes and colors as your main theme. This allows you to stop using the preview functions every minute, which is basically the main advantage of WYSIWYG by design.

CKEditor 4 logo CKEditor 4
TinyMCE 6 logo TinyMCE 6
TinyMCE 5 logo TinyMCE 5
TinyMCE 4 logo TinyMCE 4

Install Include CSS & JS plugin in CKEditor 4

Download Include CSS & JS
ZIP archive of Include CSS & JS for CKEditor 4

Then do these simple steps:

  1. Copy IncludeCssJs directory to ckeditor/plugins/.
  2. Edit CKEditor config and add IncludeCssJs to extraPlugins parameter.

All the buttons this plugin will add to your toolbar automatically.

Using config file
Using initialization script

Example of configuring with config.js

If you prefer to edit config.js config file of CKEditor or when your CKEditor initialization code is placed inside some non-editable part of CMS, make these changes there:

CKEDITOR.editorConfig = function(config) {
    config.extraPlugins = "IncludeCssJs";
};

Example of configuring inside initialization code

Some CMSs do not use config.js file and let to edit CKEditor initialization script only. Do this changes there:

CKEDITOR.replace("#editor", {
    extraPlugins: "IncludeCssJs",
});

Install Include CSS & JS plugin in TinyMCE 6

Download Include CSS & JS
ZIP archive of Include CSS & JS for TinyMCE 6
Self-hosted TinyMCE 6
Cloud TinyMCE 6

Install the plugin to TinyMCE 6 hosted on your server

  1. Copy IncludeCssJs directory to tinymce/plugins/.
  2. Edit TinyMCE config and add IncludeCssJs to plugins parameter.

All the buttons this plugin will add to your toolbar automatically.

Example

Here you can see sample TinyMCE initialization code with config inside it:

TinyMCE.init({
    selector: "#editor",
    plugins: "IncludeCssJs",
});

Refer to TinyMCE add-ons installation manual for more details

Install the plugin to cloud edition of TinyMCE 6

  1. Copy IncludeCssJs directory somewhere on your server where it can be accessible by a link.
  2. Specify the location of just copied Include CSS & JS plugin adding key-value pair in external_plugins TinyMCE config parameter.
  3. Edit TinyMCE config and add IncludeCssJs to plugins parameter.

All the buttons this plugin will add to your toolbar automatically.

Example

Here you can see sample cloud TinyMCE initialization code with config inside it:

TinyMCE.init({
    selector: "#editor",
    plugins: "IncludeCssJs",
    external_plugins: {
        "IncludeCssJs": "http://example.com/public/IncludeCssJs/plugin.min.js",
    },
});

Refer to TinyMCE add-ons installation manual for more details

Install Include CSS & JS plugin in TinyMCE 5

Download Include CSS & JS
ZIP archive of Include CSS & JS for TinyMCE 5
Self-hosted TinyMCE 5
Cloud TinyMCE 5

Install the plugin to TinyMCE 5 hosted on your server

  1. Copy IncludeCssJs directory to tinymce/plugins/.
  2. Edit TinyMCE config and add IncludeCssJs to plugins parameter.

All the buttons this plugin will add to your toolbar automatically.

Example

Here you can see sample TinyMCE initialization code with config inside it:

TinyMCE.init({
    selector: "#editor",
    plugins: "IncludeCssJs",
});

Refer to TinyMCE add-ons installation manual for more details

Install the plugin to cloud edition of TinyMCE 5

  1. Copy IncludeCssJs directory somewhere on your server where it can be accessible by a link.
  2. Specify the location of just copied Include CSS & JS plugin adding key-value pair in external_plugins TinyMCE config parameter.
  3. Edit TinyMCE config and add IncludeCssJs to plugins parameter.

All the buttons this plugin will add to your toolbar automatically.

Example

Here you can see sample cloud TinyMCE initialization code with config inside it:

TinyMCE.init({
    selector: "#editor",
    plugins: "IncludeCssJs",
    external_plugins: {
        "IncludeCssJs": "http://example.com/public/IncludeCssJs/plugin.min.js",
    },
});

Refer to TinyMCE add-ons installation manual for more details

Install Include CSS & JS plugin in TinyMCE 4

Download Include CSS & JS
ZIP archive of Include CSS & JS for TinyMCE 4

Then do these simple steps:

  1. Copy IncludeCssJs directory to tinymce/plugins/.
  2. Edit TinyMCE config and add IncludeCssJs to plugins parameter.

All the buttons this plugin will add to your toolbar automatically.

Example

Here you can see sample TinyMCE initialization code with config inside it:

TinyMCE.init({
    selector: "#editor",
    plugins: "IncludeCssJs",
});

Refer to TinyMCE add-ons installation manual for more details

Reviews

CKEditor cuts some of the code I paste into Source dialog particularly javascript even though I disable Advanced Content Filter in config.js with: "config.allowedContent = true".

And I found this addon and the problem was solved. I just include js to my CKEditor config and js and css are applied to the page it is being edited.

User icon
Dipak K.
Freelancer

Tell a friend about Include CSS & JS

Send