Easy Image Upload logo

Easy Image Upload plugin

Instant upload and insert image
Easy image Upload screenshot
Easy image Upload screenshotOverview screenshot
Easy Image Upload logo

Easy Image Upload - the simplest way to upload images to your website.

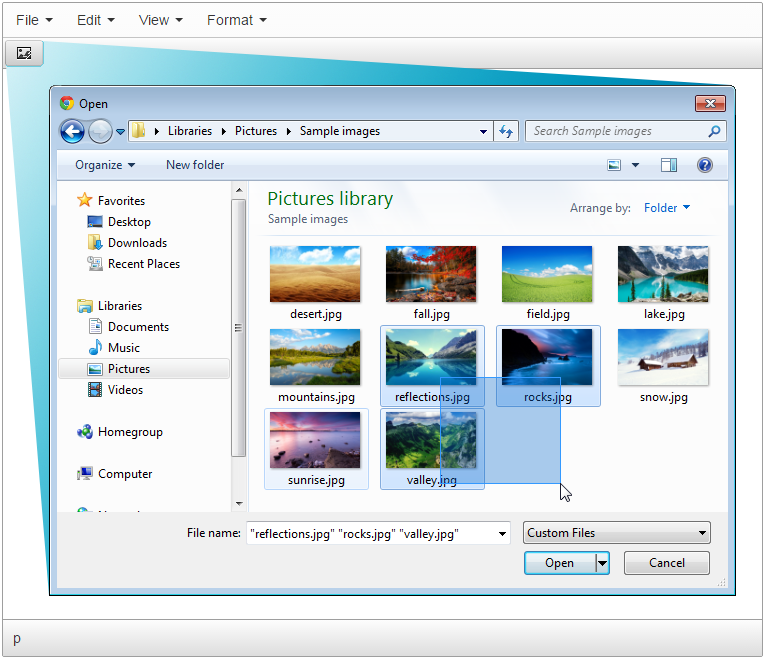
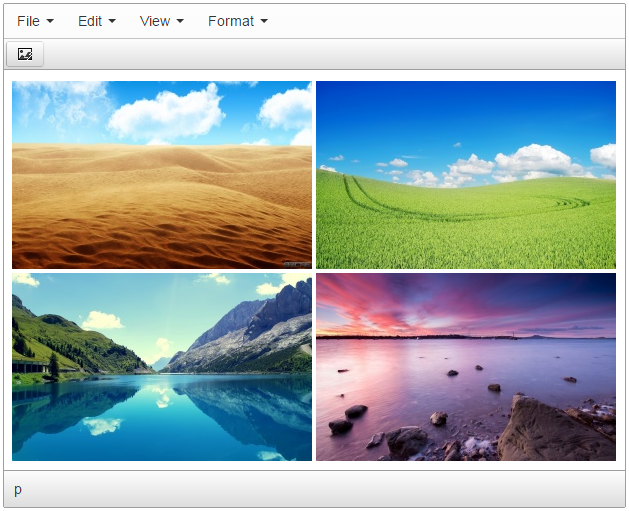
It gives you a power to upload image or a group of images by clicking on files. They are being uploaded and inserted automatically after you proceed.

UI of the add-on is extremely easy but plugin has many useful options. For example it can resize images as you wish: see configuration manual for more info.

Easy Upload plugin comes with uploader for PHP and ASP.NET webservers. There is installation manual for quick installing and the article about all tricks when you want to install it on IIS + .NET server.

Both TinyMCE 3 and TinyMCE 4 are supported.

CKEditor 4 logo CKEditor 4
TinyMCE 6 logo TinyMCE 6
TinyMCE 5 logo TinyMCE 5
TinyMCE 4 logo TinyMCE 4

Install Easy Image Upload plugin in CKEditor 4

Download Easy Image Upload
ZIP archive of Easy Image Upload for CKEditor 4

Then do these simple steps:

  1. Copy EasyImageUpload directory to ckeditor/plugins/.
  2. Edit CKEditor config and add EasyImageUpload to extraPlugins parameter.

All the buttons this plugin will add to your toolbar automatically.

Using config file
Using initialization script

Example of configuring with config.js

If you prefer to edit config.js config file of CKEditor or when your CKEditor initialization code is placed inside some non-editable part of CMS, make these changes there:

CKEDITOR.editorConfig = function(config) {
    config.extraPlugins = "EasyImageUpload";
};

Example of configuring inside initialization code

Some CMSs do not use config.js file and let to edit CKEditor initialization script only. Do this changes there:

CKEDITOR.replace("#editor", {
    extraPlugins: "EasyImageUpload",
});

Install Easy Image Upload plugin in TinyMCE 6

Download Easy Image Upload
ZIP archive of Easy Image Upload for TinyMCE 6
Self-hosted TinyMCE 6
Cloud TinyMCE 6

Install the plugin to TinyMCE 6 hosted on your server

  1. Copy EasyImageUpload directory to tinymce/plugins/.
  2. Edit TinyMCE config and add EasyImageUpload to plugins parameter.

All the buttons this plugin will add to your toolbar automatically.

Example

Here you can see sample TinyMCE initialization code with config inside it:

TinyMCE.init({
    selector: "#editor",
    plugins: "EasyImageUpload",
});

Refer to TinyMCE add-ons installation manual for more details

Install the plugin to cloud edition of TinyMCE 6

  1. Copy EasyImageUpload directory somewhere on your server where it can be accessible by a link.
  2. Specify the location of just copied Easy Image Upload plugin adding key-value pair in external_plugins TinyMCE config parameter.
  3. Edit TinyMCE config and add EasyImageUpload to plugins parameter.

All the buttons this plugin will add to your toolbar automatically.

Example

Here you can see sample cloud TinyMCE initialization code with config inside it:

TinyMCE.init({
    selector: "#editor",
    plugins: "EasyImageUpload",
    external_plugins: {
        "EasyImageUpload": "http://example.com/public/EasyImageUpload/plugin.min.js",
    },
});

Refer to TinyMCE add-ons installation manual for more details

Install Easy Image Upload plugin in TinyMCE 5

Download Easy Image Upload
ZIP archive of Easy Image Upload for TinyMCE 5
Self-hosted TinyMCE 5
Cloud TinyMCE 5

Install the plugin to TinyMCE 5 hosted on your server

  1. Copy EasyImageUpload directory to tinymce/plugins/.
  2. Edit TinyMCE config and add EasyImageUpload to plugins parameter.

All the buttons this plugin will add to your toolbar automatically.

Example

Here you can see sample TinyMCE initialization code with config inside it:

TinyMCE.init({
    selector: "#editor",
    plugins: "EasyImageUpload",
});

Refer to TinyMCE add-ons installation manual for more details

Install the plugin to cloud edition of TinyMCE 5

  1. Copy EasyImageUpload directory somewhere on your server where it can be accessible by a link.
  2. Specify the location of just copied Easy Image Upload plugin adding key-value pair in external_plugins TinyMCE config parameter.
  3. Edit TinyMCE config and add EasyImageUpload to plugins parameter.

All the buttons this plugin will add to your toolbar automatically.

Example

Here you can see sample cloud TinyMCE initialization code with config inside it:

TinyMCE.init({
    selector: "#editor",
    plugins: "EasyImageUpload",
    external_plugins: {
        "EasyImageUpload": "http://example.com/public/EasyImageUpload/plugin.min.js",
    },
});

Refer to TinyMCE add-ons installation manual for more details

Install Easy Image Upload plugin in TinyMCE 4

Download Easy Image Upload
ZIP archive of Easy Image Upload for TinyMCE 4

Then do these simple steps:

  1. Copy EasyImageUpload directory to tinymce/plugins/.
  2. Edit TinyMCE config and add EasyImageUpload to plugins parameter.

All the buttons this plugin will add to your toolbar automatically.

Example

Here you can see sample TinyMCE initialization code with config inside it:

TinyMCE.init({
    selector: "#editor",
    plugins: "EasyImageUpload",
});

Refer to TinyMCE add-ons installation manual for more details

Reviews

Be the first who will write a feedback for this plugin.

Tell a friend about Easy Image Upload

Send